So, I was sitting in the Wal-Mart parking lot bracing myself to go inside to buy Hannah a box of diapers. Then it hit me...why do I do this to myself every month? A lot of people are going to cloth diapers. I wanted to do cloth diapers for quite some time and now figure here is my chance. Nothing is stopping me!
I went into the store and bought:
2 yards of plain turquoise flannel (it was on sale for $2 a yard)
1/2 yard of 2 really cute patterns of flannel (each cost $3.47 a yard)
3/4 in X 1 yd. sew on Velcro for $.84 each (I bought 2)
3/8 in X 6 yards elastic at a dollar something each (I bought 2)
A pack of 18 washclothes for $4.00 (These are on sale now because it is college time and they are trying to get college students to buy these.
All of this cost me under $19.00 which I would have spent on a box of disposable diapers for this pay period.
I did not have to buy thread since I had some at home. I also have a Singer sewing machine. If you had to buy these two things your prices would differ from mine.
I came home a got right down to business. I used this website to
http://mayna.livejournal.com/198548.html get me started and adjusted it some.
First you must make a pattern for the diapers. I traced a diaper that currently fits my daughter. I made this pattern a couple times and revamped it. Remember you will most likely not get it completely right the first time. I finally made this pattern and it worked for my daughter.
I taped 3 pieces of white copy paper together and traced this pattern. I found you need to make the top wings a little longer then what you think because disposable diapers can stretch really far while cloth does not. Think about your child's legs and hips as you are making the pattern.
I have the pattern made and now need to cut out the fabric for the diapers. I suggest using something softer for your baby's bottom. I like using flannel because it is soft. I am using all the same colors for this diaper, but you can mix and match as needed.
I am not a great pinner and then cut. I am much better with tracing the pattern directly onto the fabric. Do what works best for you though. Make sure when cutting the fabric is folded so you are cutting out two pieces at once instead of just one at a time. These 2 first pieces will be the outside which will be seen and the other 2 will be the inside that cannot be seen. I am only using the same flannel for both the inside and outside because I ran out of my ugly flannel to go on the inside. Pick a flannel or material to go on the inside that is not your favorite because it will never be seen!
After you have gotten your 4 diaper pieces cut out, take a wash cloth and fold it in half. You can also use fabric pieces instead of a washcloth. It must be in a rectangle shape though! I also laid a few scrapes of material inside the washcloth before folding it in half to give it more soaking power.
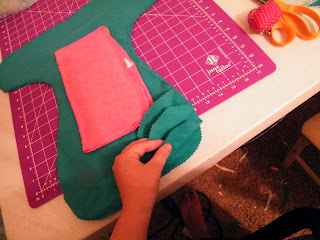
You then place the soak pad (washcloth) in the middle an inside diaper piece. This is the piece that will not be seen by anyone. I made sure to pin the washcloth to the piece that has the pen marks on it. Make sure it is centered the best you can. Pin it in place to keep it from moving. Then sew it all the way around with a straight stitch. Make sure you sew backwards when you begin sewing and at the end of your stitch to keep the stitches from coming out.
This is what it looks like sewed to the diaper.
Okay, here comes the hard part since I am using all one color.
You will now begin layering your diaper to sew together.
On the table, lay one of our inside pieces that no one will see. On top of that lay a seen piece with the pattern you want on the outside facing up. Then lay the other seen piece on top of the other seen piece with the pattern you want seen facing each other. Then you lay the inside piece that has the washcloth sew it on the top with the washcloth facing upwards.
See how I have four layers? The point when you sew it and turn it inside out, the cute patterns you picked for the outside will be seen and the washcloth will be hidden. If you are still confused by this step, please see other blog as well. It may help! :-)
Now pin together the four pieces. You are going to sew around the edges with a straight stitch, but leave the bottom( the rounded bottom without the wings) open so that you can turn it inside out. Try to sew as close to the edge as possible on the wings so they maintain their shape.
See how I have the pins holding the bottom together? I did not sew here yet. After you are done sewing this together, you need to go around the edges and cut off the extra material being careful not to cut a hole in the fabric or cut your stitches.

Take your elastic and along the top figure out how much bunching you want. I usually just guess and do not measure.
Place your thumb on one end of the elastic and take your other hand and stretch the elastic as far as it will go. You will need to mark the spot where you want the elastic to stop and start. Using a zig zag stitch, hold down the elastic and stretch it as you are sewing so the diaper will bunch correctly. My best advice is sew a few stitches so that when you stretch the elastic it will not come out and be anchored when you begin to stretch.
It should look like this! Do not feel bad if you do not get it the first time. I has a hard time get it right the first time I did this.
Now, fold your diaper in half to figure out where the legs will be. You will then mark on both sides where the legs begin and end. Match up your elastic to these marks by taking one end of the elastic and stretching it to the next mark. I suggest doing this before cutting it so that way you won't waste any. Then sew it to the diaper, stretching it as you sew.
Do this on both legs.
This what it should like when you get done.
Now turn the diaper inside out. Fold the bottom together and sew it together with a straight stitch.
This what it looks like all sewed up.
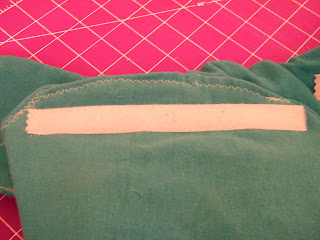
Now it is time to place the Velcro on the diaper. Fold the diaper so the bottom up like you are placing it on your baby. Pin Velcro all the way across the lip (or whatever you want to call it. Haha) and sew it into place with a zig zag stitch.
Cut and place Velcro on the wings now. These should be placed on the wings so that they match up with the Velcro on the lip of the bottom. Sew them on with a zig zag stitch.
And you are DONE! Simple huh?
Don't feel bad if you mess up or don't make them the right size at first. You will get the hang of it. I also made covers for the diapers with a shower curtain and cloth (stay tuned for that pattern!)
Diaper with cover!
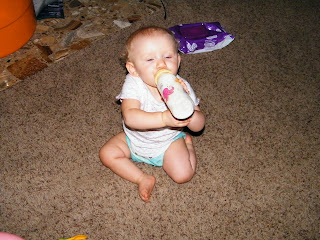
Baby in cloth diaper. She looks pretty excited about it! Haha


 Finished my first 5K!


